INGREDIENTS
WSL2 now natively supports systemd
in Windows 11 as well as Windows 10. Although you need to explicitly enable systemd and WSL2 ends up consuming more system memories and resources, we recommend enabling systemd if your version of Ubuntu is 22.04 or later. Ubuntu seems to be getting more dependent on systemd and its related services and daemons. For example, if you want to install Firefox in one of those recent Ubuntu versions, you need to have its snap
command working and that requires snapd
as well as systemd. When you enable systemd, all those dependencies are automatically installed and configured; those newly added services and daemons also create a more consistent and complete Linux GUI environment for your WSL2 sessions.
If the apps you want to use via WSL2 don't require systemd or you want to configure WSL2 with a minimal set of services and daemons, we recommend at least enabling D-Bus as outlined in the following post. When you enable systemd, you don't need to separately configure D-Bus; it's automatically configured and ready for your WSL2 sessions when you just enable systemd as mentioned above.
Sharing D-Bus among WSL2 ConsolesWe prepared this post to help our X410 users who want to set up an Ubuntu GUI desktop environment in WSL2 with systemd enabled. However, overall steps for setting up the GUI desktop should also be similar for other X-Window servers for Windows.
We will be setting up a full Ubuntu desktop environment with X410 in its Floating Desktop mode. X410 also has Windowed Apps mode that allows Linux GUI apps to seamlessly run side by side with Windows apps. For more information about enabling systemd and running Linux GUI apps in Windowed Apps mode while maintaining their UI consistency in Ubuntu GUI desktop theme (colors, icons etc.), please read the following post.
Enable systemd and simplify running Linux apps like Windows apps in Ubuntu GUI styleIn this post, you should also be able to find additional information about avoiding the problems that might occur while installing and setting up an Ubuntu desktop. We also have included examples of scripts and batch files that can simplify starting your Ubuntu desktop directly from Windows.
The device we used for preparing this post showed the following information for WSL.
C:\> wsl --version
WSL version: 1.2.0.0
Kernel version: 5.15.90.1
WSLg version: 1.0.51
MSRDC version: 1.2.3770
Direct3D version: 1.608.2-61064218
DXCore version: 10.0.25131.1002-220531-1700.rs-onecore-base2-hyp
Windows version: 10.0.22621.1555
// Start here
We executed the following command from Windows Command Prompt for installing Ubuntu in WSL. You can also use Microsoft Store app for installing Ubuntu.
wsl.exe --install Ubuntu-22.04
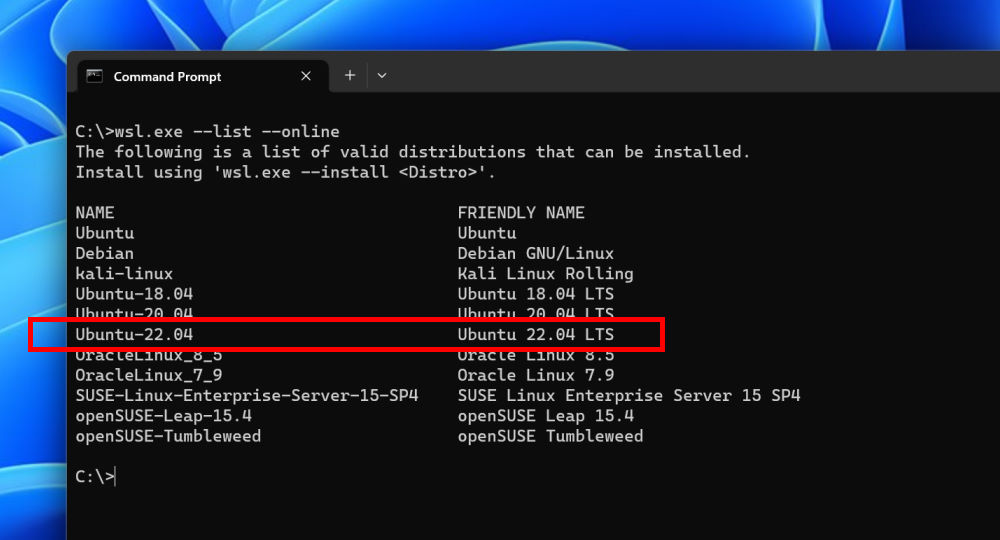
You can get a list of available WSL/Linux distros that can be installed directly via the wsl.exe
command by using its --list
and --online
option arguments.
wsl.exe --list --online
Once Ubuntu is installed and you have finished its initial set up, i.e., entering a username and password, execute the following command from an Ubuntu command prompt and update the newly installed Ubuntu.
sudo apt update && sudo apt upgrade -y
In order to enable systemd, you need to explicitly create a WSL configuration file in your Ubuntu installation, /etc/wsl.conf
If you are using vi text editor, you can execute the following command to create and edit the configuration file.
sudo vi /etc/wsl.conf
Once the file is opened, enter the following lines, and close the file.
[boot]
systemd=true
You can run both WSLg and X410 together and configure your settings to have Ubuntu desktop shown on X410. But we recommend disabling WSLg completely as some Linux GUI apps can be confused and behave erratically when both WSLg and X410 are running at the same time.
In order to disable WSLg, you can simply create a WSL configuration file, i.e., .wslconfig in your Windows personal folder (ex. C:\Users\<Your-Windows-User-Name>) and restart WSL. You can open your Windows personal folder in File Explorer by entering the following Windows environment variable.
%USERPROFILE%
In your .wslconfig file, you need to have the following lines in order to disable WSLg.
[wsl2]
guiApplications=false
For restarting WSL, you need to execute the following command from Windows Command Prompt or PowerShell. You can also execute the command from a WSL console as WSL supports running Windows executables directly from its console sessions.
wsl.exe --shutdown
Please note that when you shutdown WSL using the command shown above, WSL doesn't shut down immediately; you should wait for a few seconds before opening a new WSL console. For checking the shutting down status of WSL, try using --list
and --verbose
command arguments; you can also use their shorter versions, -l
and -v
respectively.
wsl.exe --list --verbose
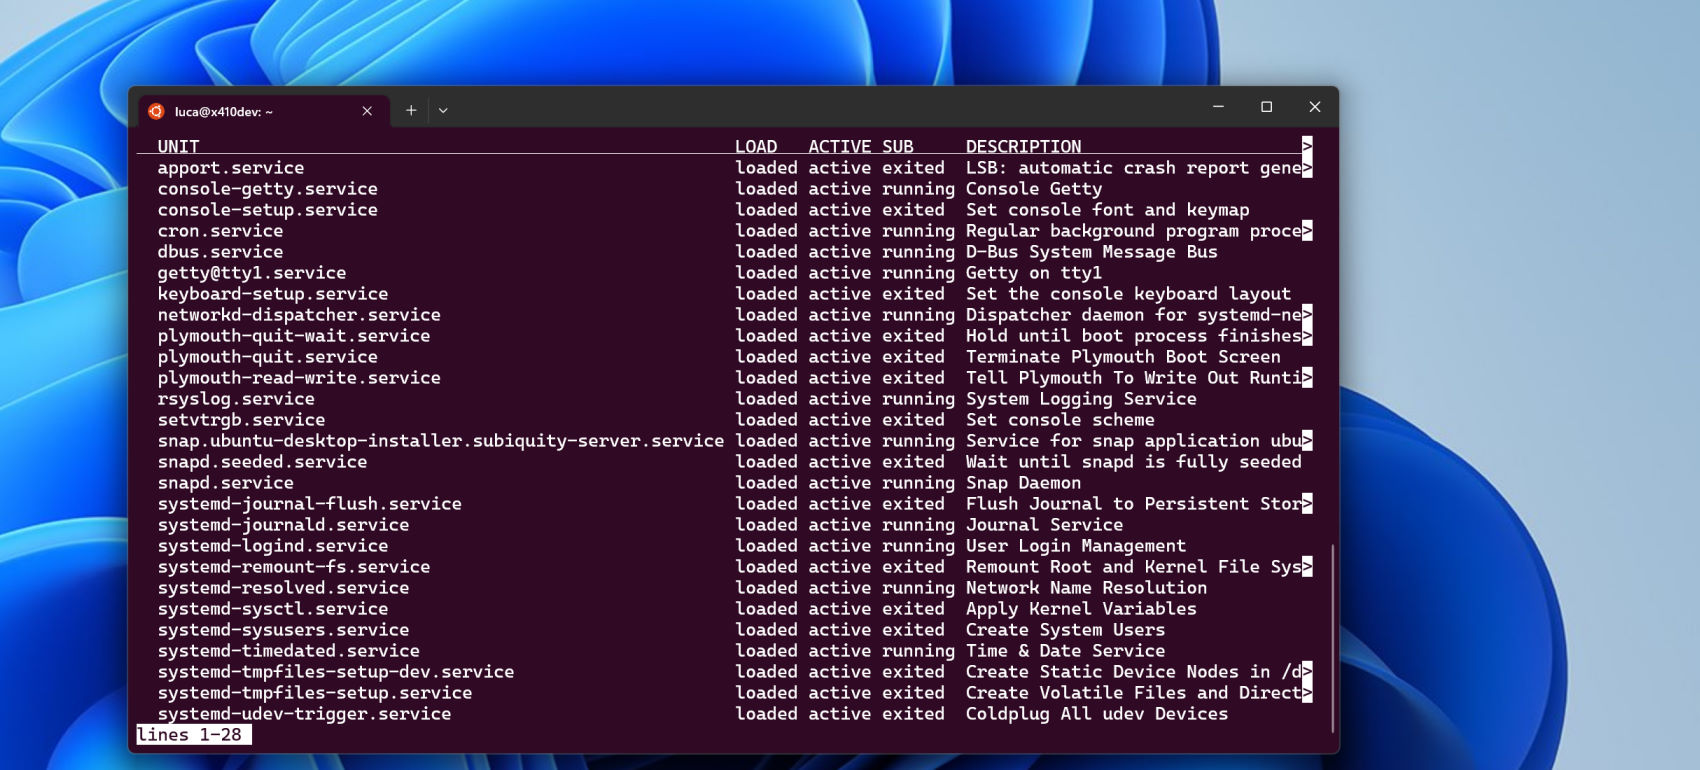
Once WSL service is shut down, you can open a new WSL console and have the service restarted. In a new WSL console, try executing the following command for checking systemd. If systemd is active and running properly as a daemon, you should see a list of services it currently manages.
systemctl list-units --type=service
Once systemd is enabled and loaded properly, you should also notice other handy services and environment variables automatically set up for you. For example, dbus-daemon
is automatically started and it provides a DBUS_SESSION_BUS_ADDRESS environment variable that is commonly used among Linux GUI apps. systemd also enables you to use snap command for installing or removing apps only available in snap packages such as Firefox.
// Basic configuration
In order for Linux GUI programs to properly render their output on X410, you need to correctly set up a DISPLAY environment variable. For more information about available DISPLAY environment variable options supported in X410, please read the following webpage.
Using X410 with WSL2In this post, we're using the following DISPLAY environment variable that makes use of TCP connections. We also have added this setting to the .profile
login script in order to have the variable automatically ready whenever we open a WSL console.
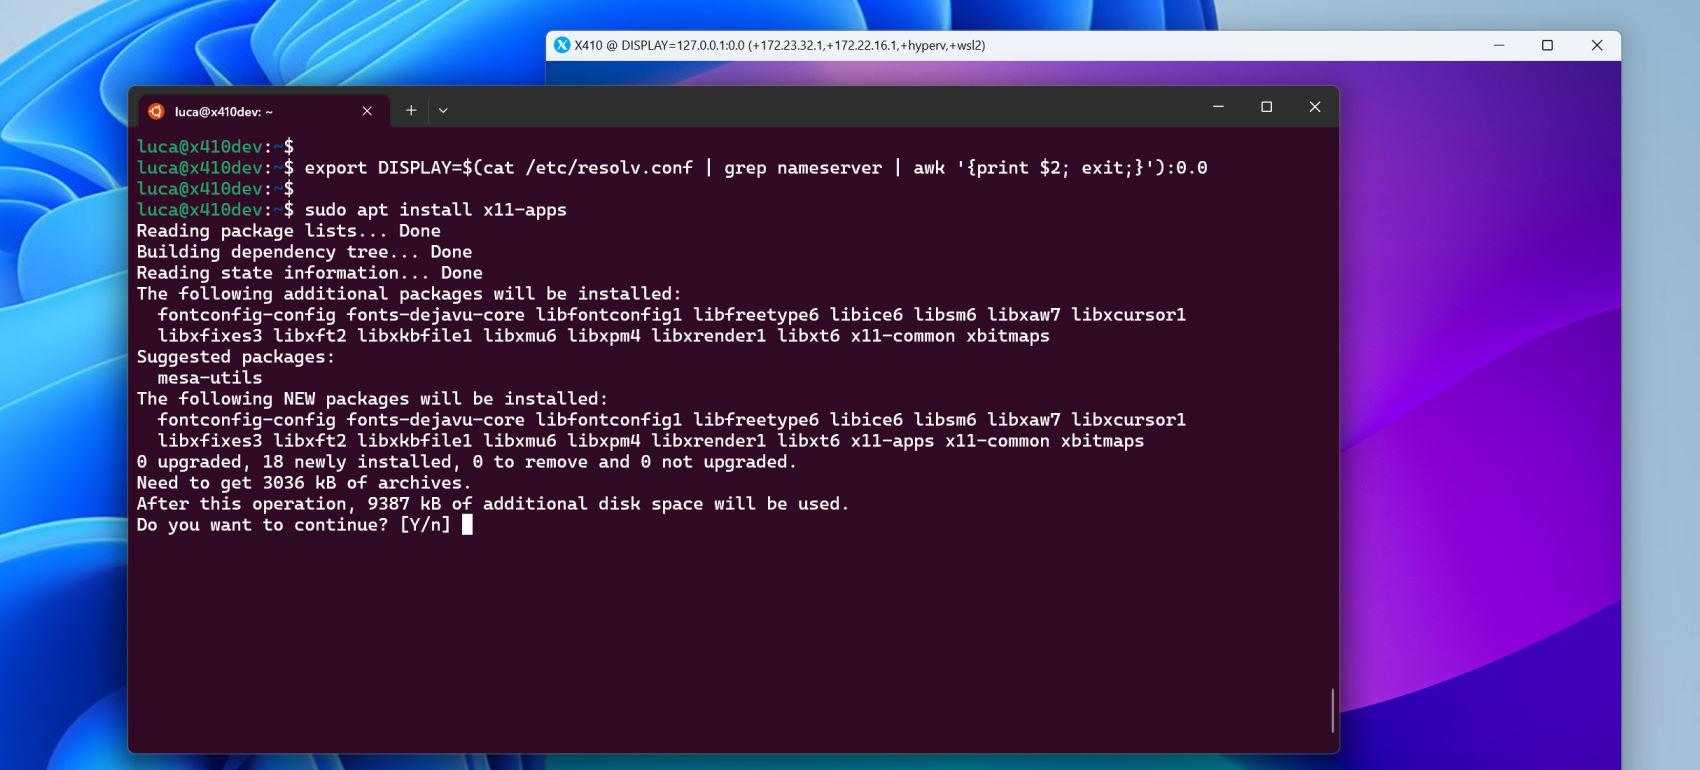
export DISPLAY=$(cat /etc/resolv.conf | grep nameserver | awk '{print $2; exit;}'):0.0
Where should I add my DISPLAY environment variable in WSL?
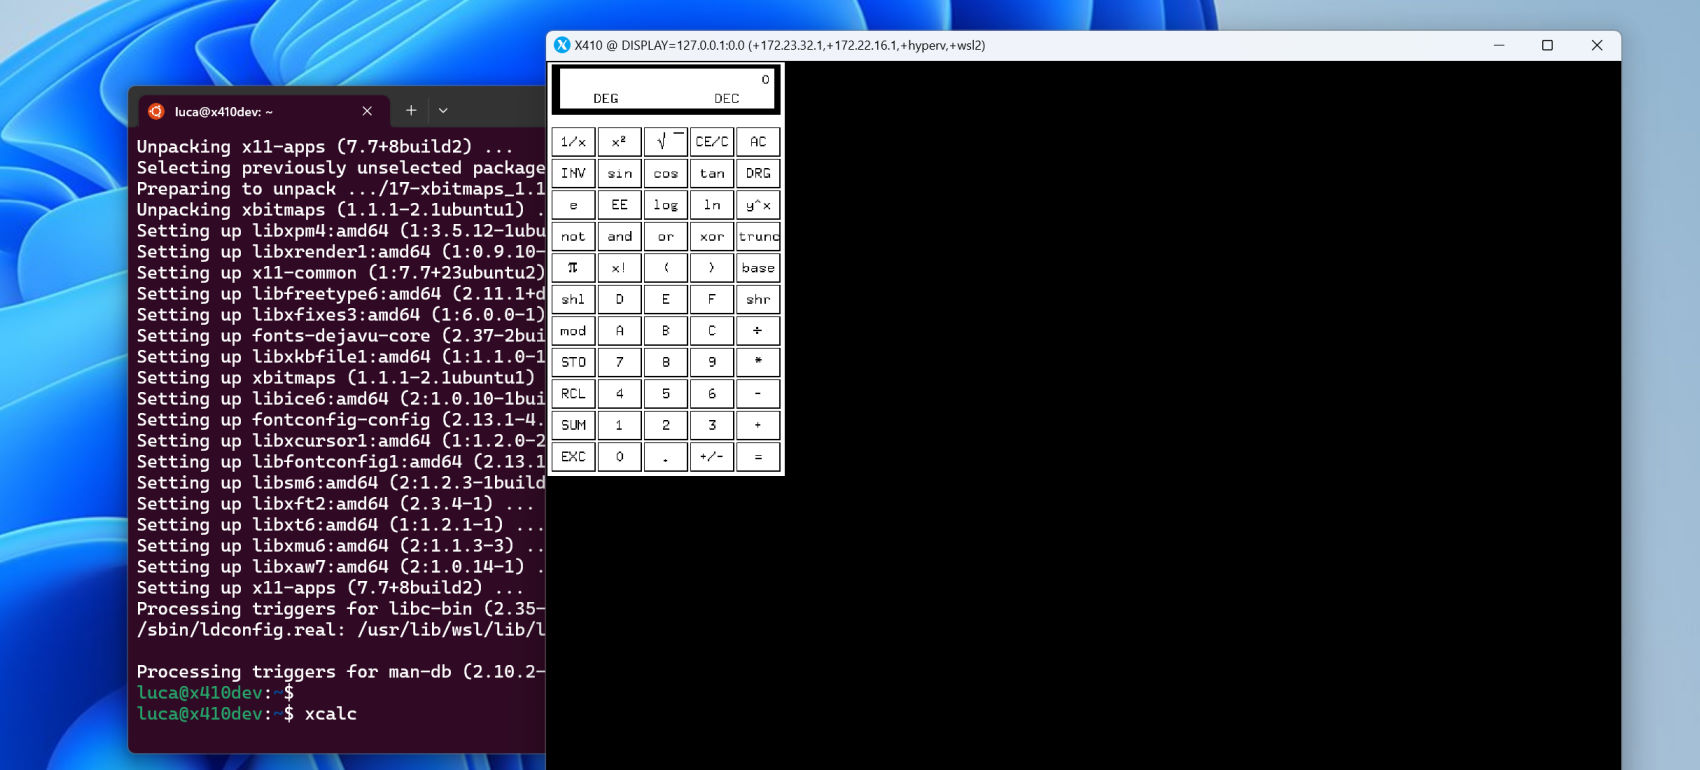
If you want to check if the DISPLAY environment variable is set up correctly, try running xcalc
, a simple classic X-Window app. Before running xcalc, you need to install x11-apps
package.
sudo apt install x11-apps
If you're not seeing xcalc, check the following post about troubleshooting the DISPLAY environment variable.
Testing DISPLAY environment variableSome Linux GUI apps expect commonly known folders such as Desktop and Documents to already exist. You can execute the following command and have them automatically created.
xdg-user-dirs-update
When you enable systemd, its default user login mode is graphical
that shows a graphical user login screen like Windows. However, since WSL is intended for a single user, such graphical login screen is not required. Hence you should change the login mode to multi-user
and skip loading services (ex. gdm3) for the graphical mode; those services will eventually fail anyhow and give you the same text login shell as the multi-user mode. But, by changing the default mode, you can minimize the initial loading delay when you start a new WSL session for the first time. The following command changes the default login mode to multi-user.
sudo systemctl set-default multi-user.target
In a perfect world, you don't need this step. However, when you install an Ubuntu desktop package in a later step, it also automatically installs acpid
(Advanced Configuration and Power Interface event Daemon) package and enables it in systemd.
WSL doesn't support accessing or receiving ACPI events in Windows and acpid should automatically adjust itself to such an environment. But, unfortunately, acpid generated endless error events and ultimately terminated systemd in our testing device. The following post discusses a similar problem in Docker containers.
https://discuss.linuxcontainers.org/t/odd-behavior-installing-ubuntu-desktop-on-ubuntu-22-04-and-lxd-22-04-containers/14275All in all, in order to avoid such problems, we recommend installing acpid beforehand and disabling it. For installing acpid, you can execute the following command.
sudo apt install acpid -y
For disabling acpid, you can execute the following command.
sudo systemctl disable --now acpid.service acpid.socket acpid.path
// Ubuntu desktop
There are two packages available for installing Ubuntu desktop: ubuntu-desktop-minimal
and ubuntu-desktop
. As the name suggests ubuntu-desktop-minimal installs a relatively small set of apps and services that are needed to create a consistent Ubuntu desktop user interface. However, when you install ubuntu-desktop package, it installs additional apps and tools such as LibreOffice.
For this post, we installed ubuntu-desktop-minimal package by executing the following command.
sudo apt install ubuntu-desktop-minimal -y
If you instead want to install a full Ubuntu desktop with extra apps and tools, you can execute the following command.
sudo apt install ubuntu-desktop -y
This step will take a while as it downloads and installs all the packages according to their dependencies.
In order to properly run Ubuntu desktop, you need to add or update some environment variables. Sourcing the following Bash script before starting your Ubuntu desktop should set up those essential environment variables. We recommend creating this file in your home folder in order to maintain consistency with other Bash login scripts (ex. .bashrc).
# X410 WSL2 Helper
# https://x410.dev/cookbook/#wsl
# --------------------
# Setting up essential environment variables for Ubuntu desktop
# --------------------
# Ubuntu default desktop (GNOME Shell variant)
# https://wiki.gnome.org/Projects/GnomeShell
export XDG_CURRENT_DESKTOP=ubuntu:GNOME
export XDG_SESSION_DESKTOP=ubuntu
export DESKTOP_SESSION=ubuntu
export GNOME_SHELL_SESSION_MODE=ubuntu
# Commonly referenced environment variables for X11 sessions
# https://specifications.freedesktop.org/basedir-spec/latest/
export XDG_CONFIG_DIRS=/etc/xdg/xdg-ubuntu:/etc/xdg
export XDG_DATA_DIRS=/usr/share/ubuntu:/usr/local/share:/usr/share:/var/lib/snapd/desktop
export XDG_MENU_PREFIX=gnome-
export XDG_SESSION_TYPE=x11
export XDG_SESSION_CLASS=user
export GDK_BACKEND=x11
# Disables using Direct3D in Mesa 3D graphics library
export LIBGL_ALWAYS_SOFTWARE=1
Please note that we have added export LIBGL_ALWAYS_SOFTWARE=1
in the above script. This environment variable forces Mesa 3D graphics library to always use software rendering. Microsoft added support for Direct3D GPU acceleration in WSL2 via Mesa 3D graphics library. But unfortunately, it caused unexpected random crashes in Ubuntu desktop in our testing. As Microsoft constantly updates WSL, perhaps you don't need to set that variable in a future version of WSL.
As we have now installed new packages and configuration files, we should restart WSL again; just like Step 4.
wsl.exe --shutdown
In a new Ubuntu console, execute the following command to merge the environment variables that were added in the script file created in Step 10 to the current Bash session. Please note that the DISPLAY environment variable is already configured in Step 5 and it should be always available whenever you open a new Ubuntu console.
. ~/.bash_ubuntu_desktop
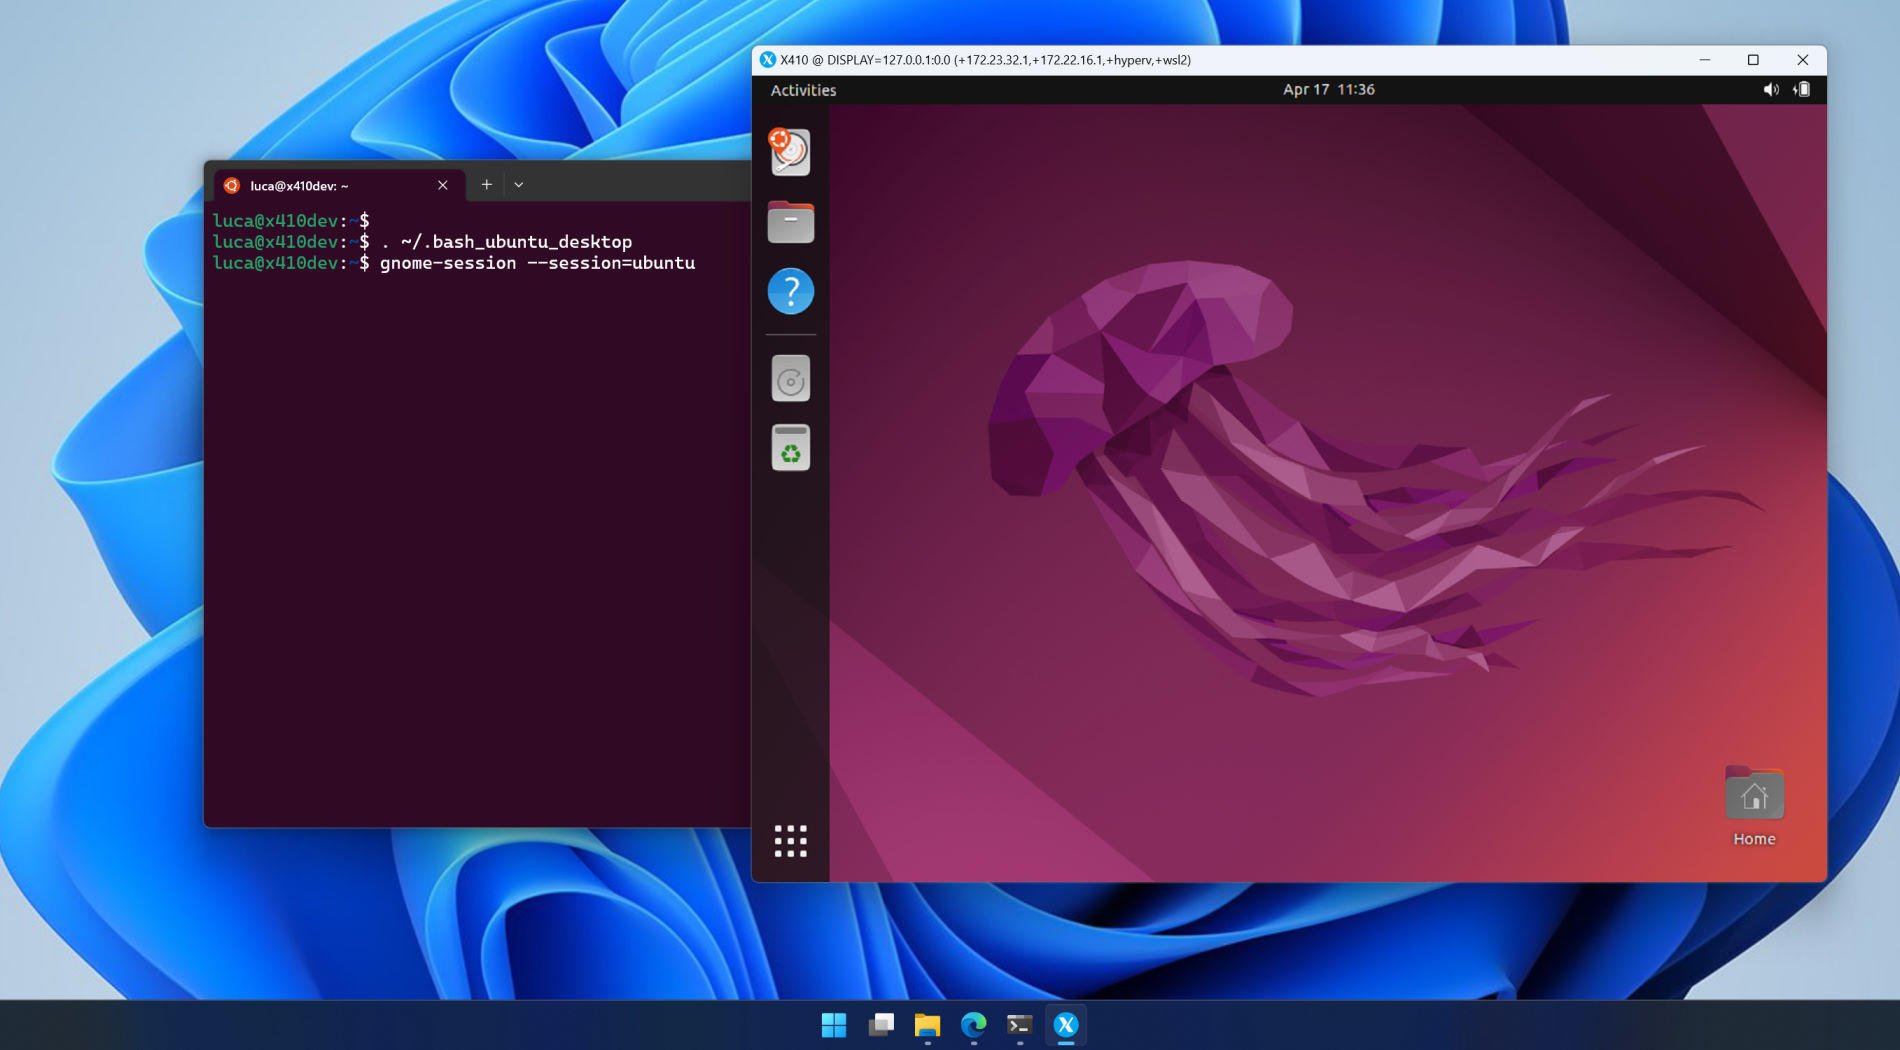
You can now finally start Ubuntu desktop by executing the following command. Before executing the following command, make sure X410 is already running in its Floating Desktop mode.
gnome-session --session=ubuntu
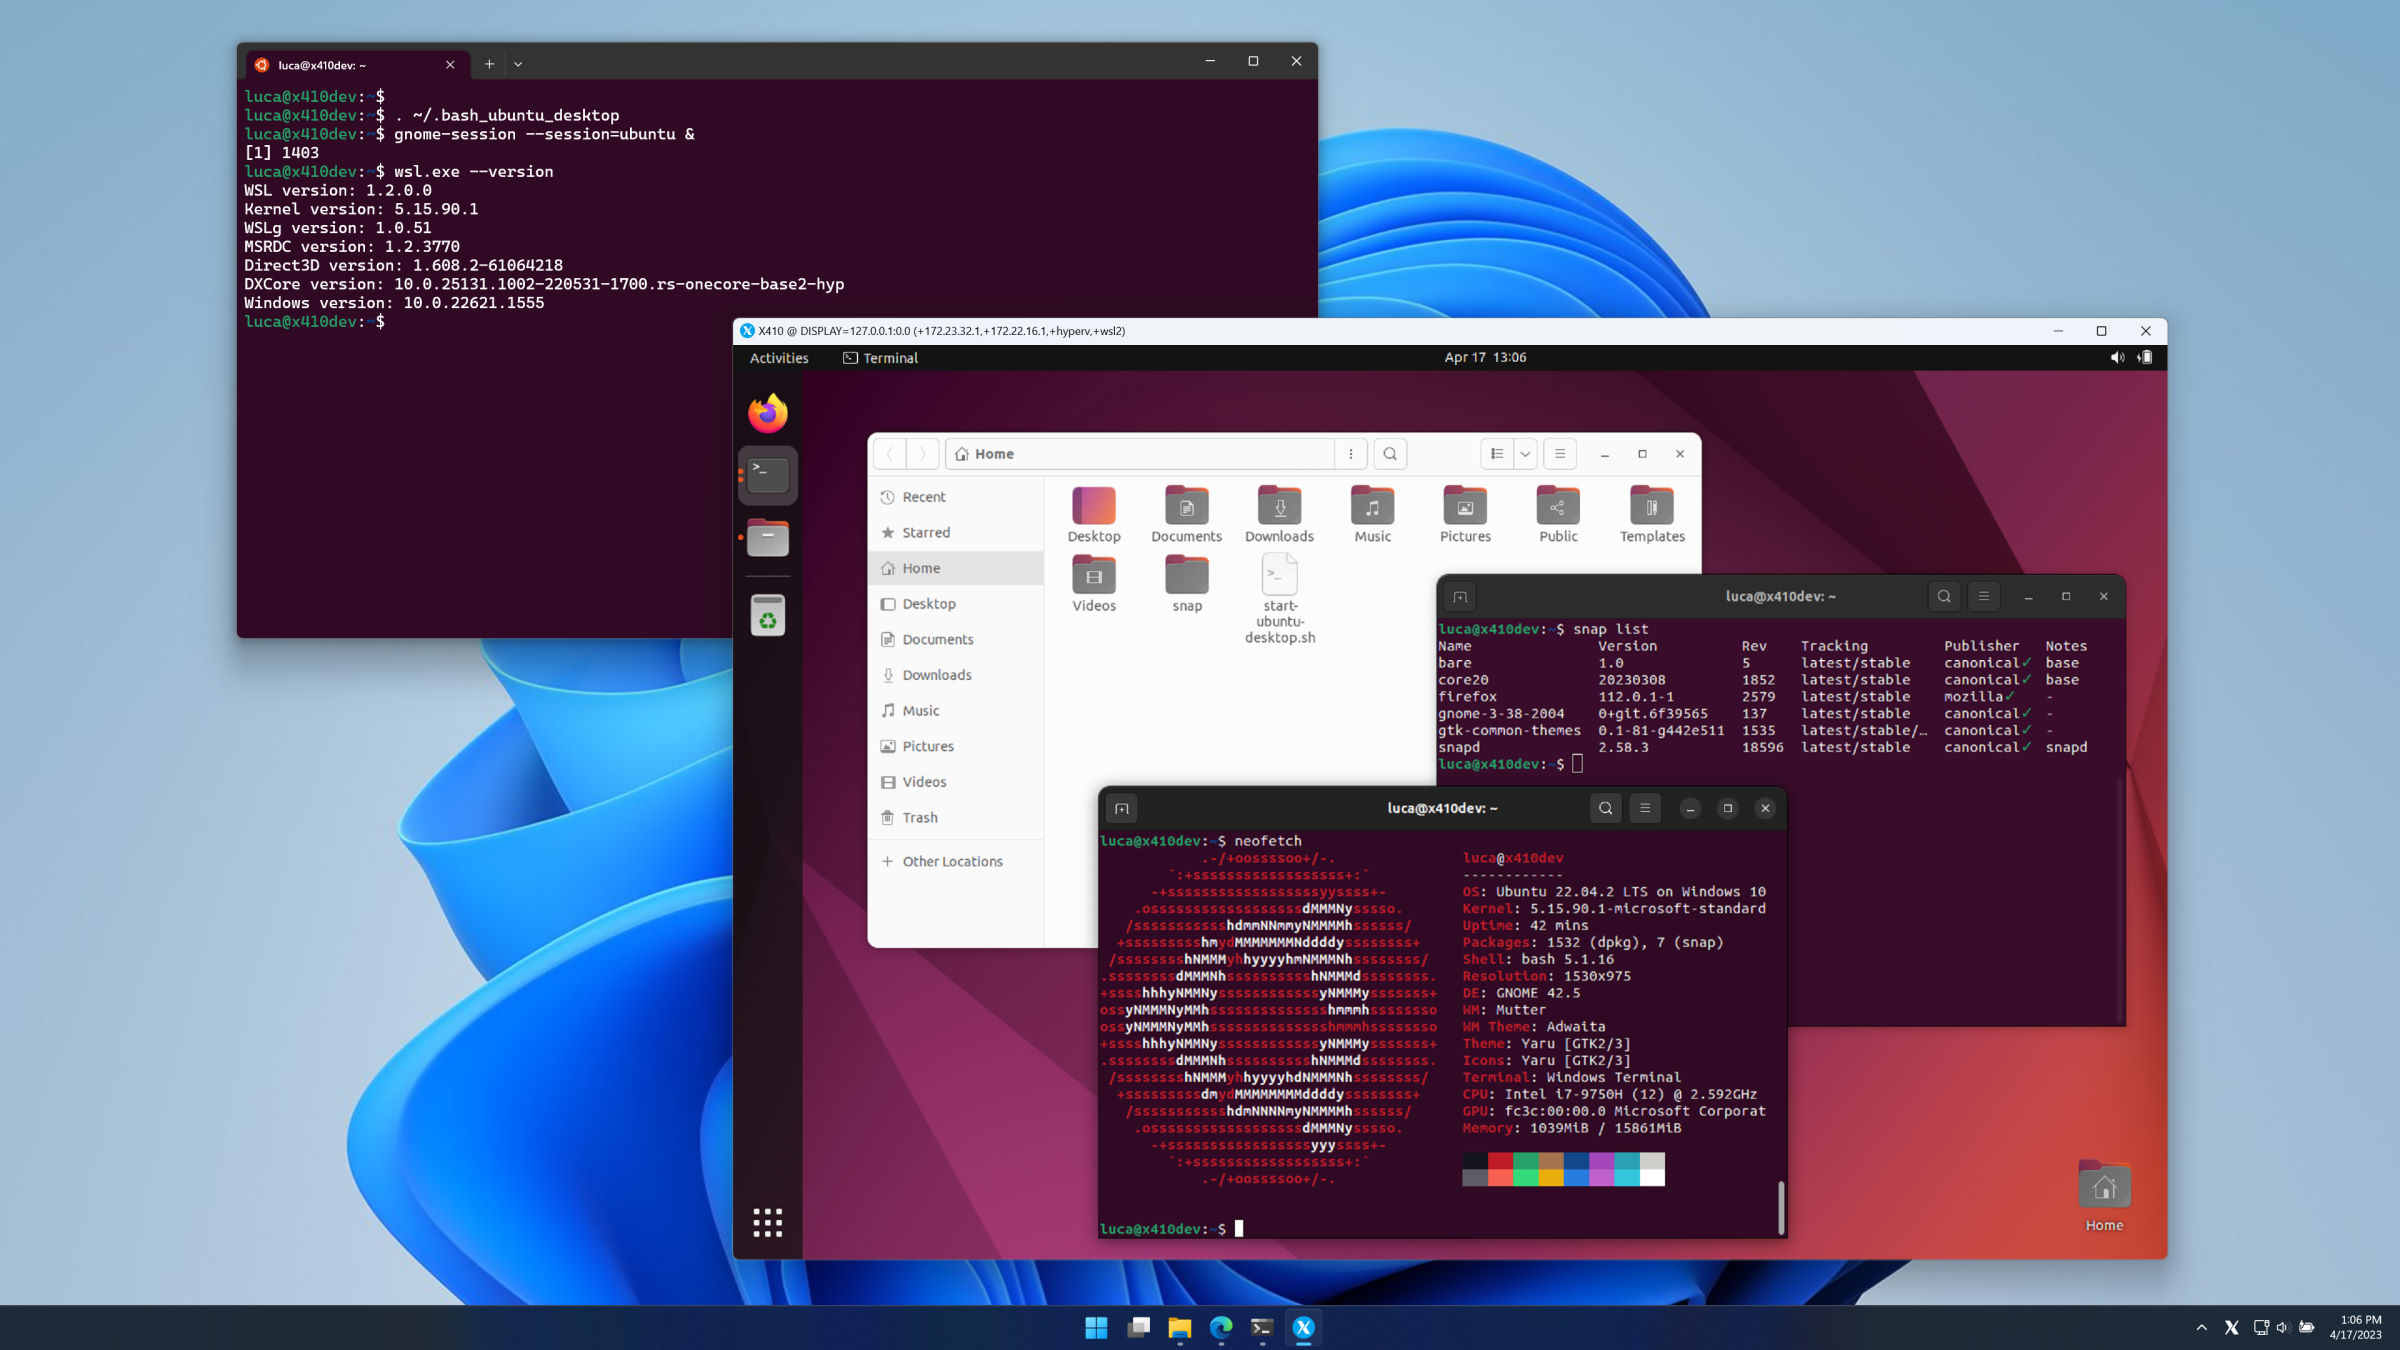
Your Ubuntu desktop is now ready!
// Extra Topics
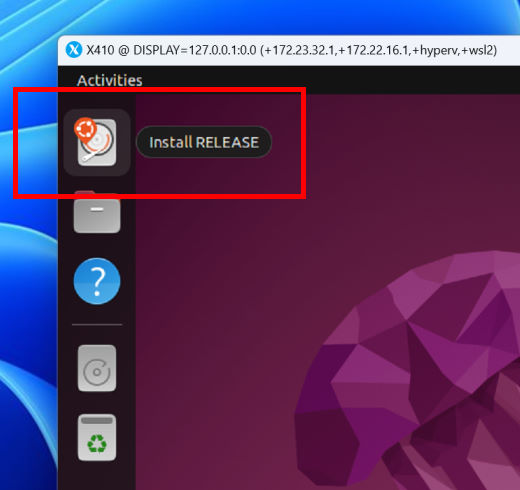
When you start Ubuntu desktop for the first time, you might notice a program shortcut for installing Ubuntu desktop on a local disk drive; a useless lingering shortcut prepared for running the Ubuntu desktop from a portable USB drive or similar. You can easily remove this shortcut by executing the following command.
sudo snap remove ubuntu-desktop-installer
When you execute the above command, you may get the following error.
error: snap "ubuntu-desktop-installer" has "auto-refresh" change in progress
If you actually check the status of snap with the following command, you should be able to find a line with a Doing
status for ubuntu-desktop-installer
.
sudo snap changes
luca@x410dev:~$ sudo snap changes ID Status Spawn Ready Summary 1 Done 56 days ago, at 13:36 PST today at 20:23 PDT Initialize system state 2 Done today at 20:23 PDT today at 20:23 PDT Initialize device 3 Doing today at 22:48 PDT - Auto-refresh snaps "core20", "snapd", "ubuntu-desktop-installer" 4 Done today at 22:53 PDT today at 22:53 PDT Refresh all snaps: no updates
You should then execute the following command and wait until the status is changed to Done
. Once the status is changed, you should be able to successfully complete the removal command shown above.
sudo snap refresh
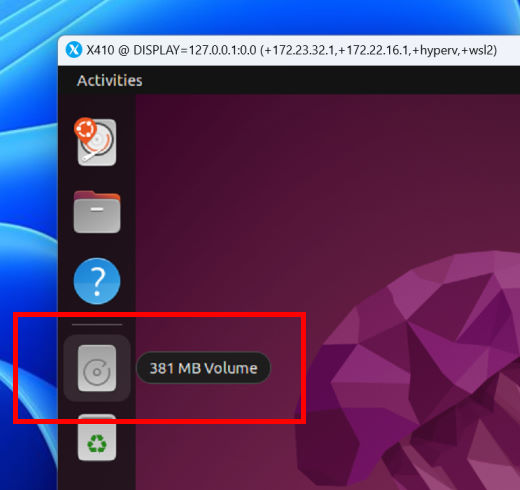
Ubuntu desktop has a feature that automatically adds a shortcut when you plug in a USB drive or mount a storage device. It seems a hidden disk partition for WSL is detected as one of those types and 381 MB Volume
shortcut is added on the Dock.
Since this automatic shortcut feature doesn't work properly in WSL anyhow, you can simply disable it and have the shortcut removed by executing the following command from a terminal.
gsettings set org.gnome.shell.extensions.dash-to-dock show-mounts false
You can also disable it via [ Ubuntu Settings ] » [ Appearance ] » [ Dock ] » [ Configure dock behavior ] » [ Show Volumes and Devices ].
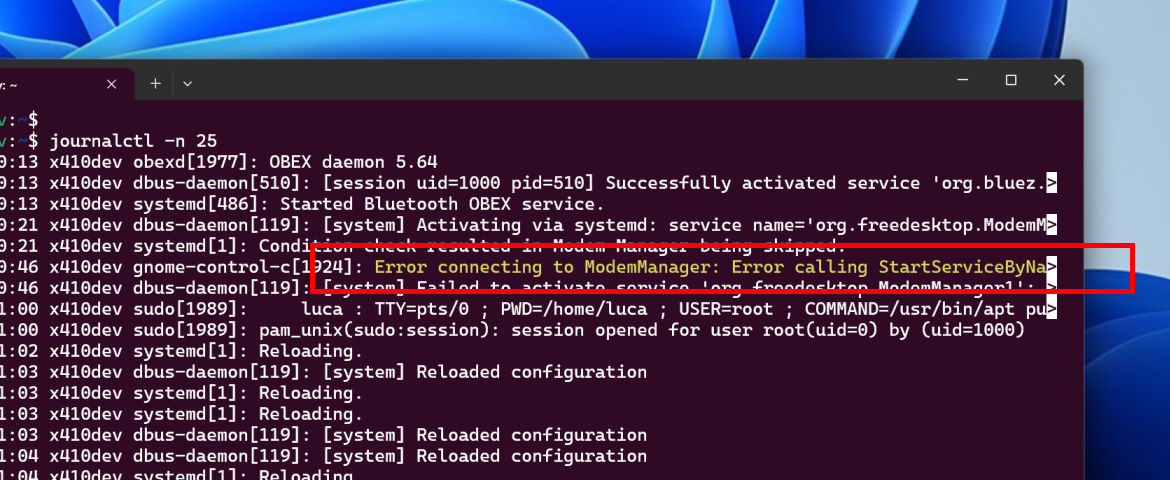
When you launch Ubuntu Settings app and notice an extreme loading delay, check the event logs in Ubuntu via journalctl
command. If you are seeing timeout events for Modem Manager
after starting Ubuntu Settings app, try removing modemmanager
package by executing the following command. It shouldn't have any impact on Ubuntu as WSL doesn't support directly accessing hardware anyhow.
sudo apt purge modemmanager
We prepared the following Bash script for starting your Ubuntu desktop more easily. When you execute the script, it automatically checks and loads the necessary environment variables and launches your Ubuntu desktop. Before executing the script, you just need to make sure that X410 is already running in its Floating Desktop mode.
#!/bin/bash
# X410 WSL2 Helper
# https://x410.dev/cookbook/#wsl
# --------------------
# Start Ubuntu desktop for Floating Desktop mode
# --------------------
if [ -z "$DISPLAY" ]; then
echo "Error: DISPLAY environment variable is not set."
exit
fi
# Merge environment variables for Ubuntu desktop
if [ -f ~/.bash_ubuntu_desktop ]; then
. ~/.bash_ubuntu_desktop
fi
# Start Ubuntu desktop
gnome-session --session=ubuntu
The following command creates ~/start-ubuntu-desktop.sh
file and sets its permission as an executable, and then launches vi
text editor.
touch ~/start-ubuntu-desktop.sh && chmod 700 $_ && vi $_
You can now start your Ubuntu desktop simply by executing the following command.
~/start-ubuntu-desktop.sh
If you want to start your Ubuntu desktop directly from Windows, you can use the following example. In the following example, we assumed that you already have a folder named wsl
in C:\
drive and you're creating a batch file, i.e., start-ubuntu-desktop.bat, in that folder.
REM ### Start X410 in Desktop Mode
start /B x410.exe /desktop
REM ### Start Linux GUI desktop
Ubuntu2204.exe run "bash --login -c 'nohup ~/start-ubuntu-desktop.sh >/dev/null 2>&1 & sleep 10'"
Please note that we have added a sleep
command for 10 seconds in the above batch file; Ubuntu2204.exe ... & sleep 10
. The sleep command is added in order to wait for the executables related to your Ubuntu desktop to be fully loaded and ready. Without the sleep command, WSL might terminate the bash session too early, and your Ubuntu desktop will never be started. You can of course try adjusting the waiting time to suit your requirements. The following post discusses more about creating a Windows batch file for launching an app in WSL.
Please also note that if you're using the Standalone version of X410, you may need to change the x410.exe
to a full file path where your Standalone version is installed, ex. "C:\Program Files\Choung Networks\X410\X410.exe" including the quotation marks.
// Troubleshooting
If GNOME desktop does not start on X410, but it prints out "Terminated" right after executing the gnome-session
, try adding the --debug
switch; it should give you some hints about what is causing the failure:
gnome-session --session=ubuntu --debug
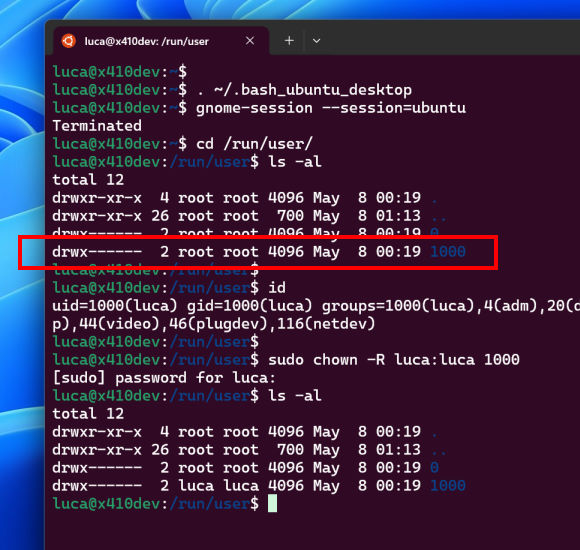
If the debug messages include something about permissions, try checking the /run/user/1000
folder. We are not sure when this started to happen in WSL, but when systemd is enabled, WSL sometimes set the owner of the /run/user/1000
folder to root
instead of your uid
. 1000
is a default uid
for the initial user account that you created for WSL. You can get your actual uid
(user ID) and gid
(group ID) by executing id
command.
/run/user/1000
folder must be owned by you! systemd creates various files and folders (ex. a socket for connecting to the DBUS daemon) that need to be accessed by the GUI apps you are running (ex. GNOME desktop). Hence, go to /run/user/
folder and check the owner of the folder 1000
. If it is not owned by you, use the chown
command and change its owner back to you!
cd /run/user/
sudo chown -R <your_uid>:<your_gid> 1000
Once the owner is changed, restart WSL (Step 11) and try starting the desktop again (Step 12).